
Android localization: Step-by-step
- May 18, 2022
- 0
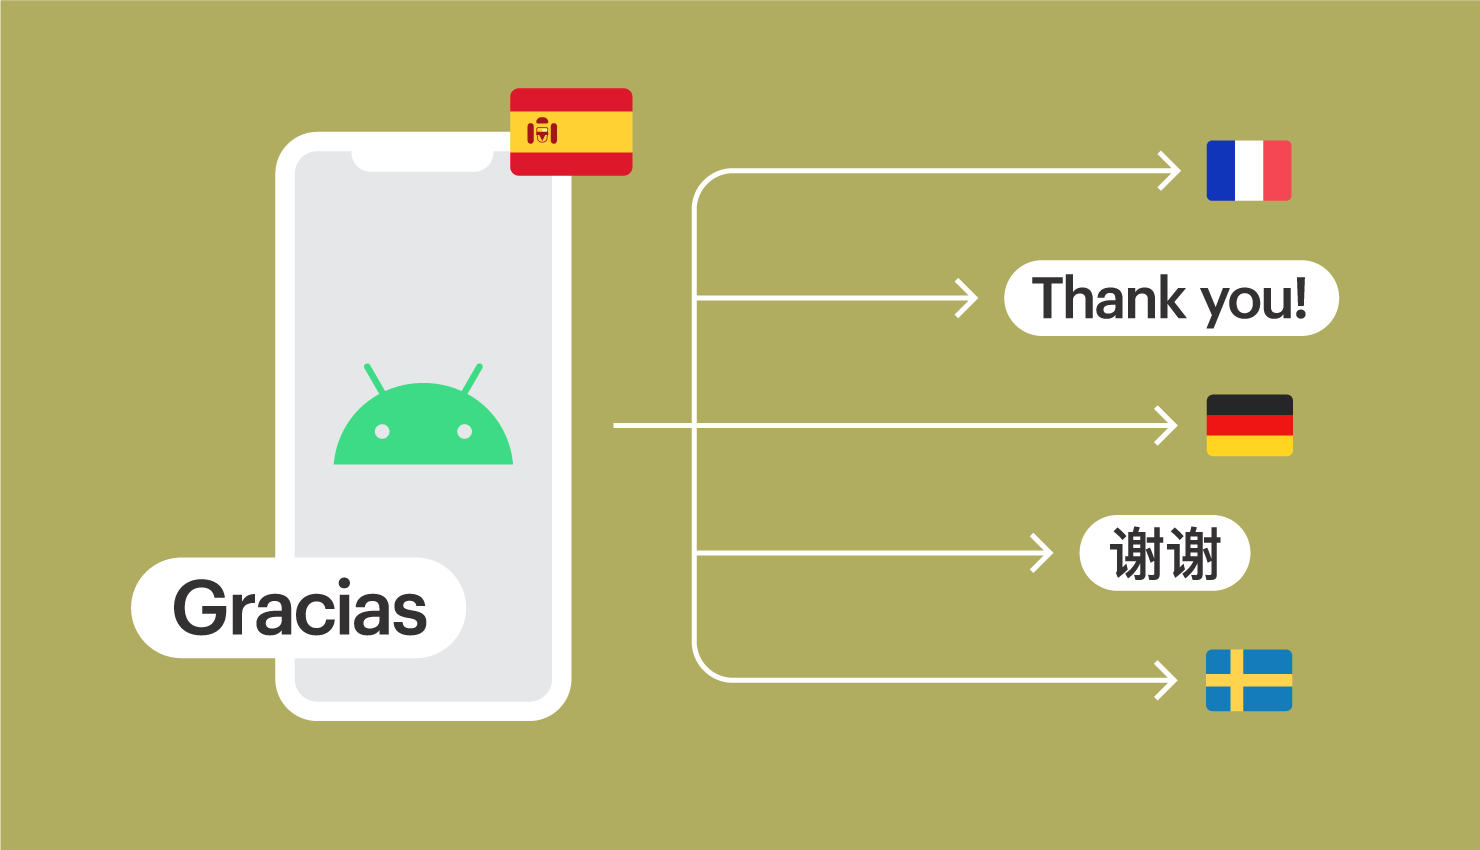
With Android’s expansive popularity among people from all over the world, getting Android localization done right has become a crucial step in app development.
You may be a novice developer building your very first Android app, or you may be an expert programmer getting yet another Android app under your belt to join a dozen others. But, let me ask you a question: Who are you creating this app for? In other words, what’s your target audience?
Hopefully, you want your app to grow and be used beyond your local community; to reach the across continents, and ultimately go global. Here’s the sticking point: most of the world does not speak English. Sooner or later, you will need to support multiple languages.
This warrants the need to localize your Android application.
In this article, we will explain how to get started with Android localization using step-by-step examples.
We will cover the following topics in this tutorial:
- Android i18n/l10n.
- Adding resources with the help of Android Studio l10n features.
- Programmatically switching locale using proxied
Context. - Localization-related deprecations across different API levels.
- Noun pluralization with Android quantity strings.
- Date-time localization using
java.text.DateFormat.getDateTimeInstance(). - Setup and use of Lokalise OTA (over the air).
You might also be interested in learning the basics of Java I18n.
The first version of this post was written by Arturs Ziborovs.
- How to localize your Android App
- Add some elements
- Add language resources
- Refer the resources
- Change the application locale programmatically
- Some Android localization extras
- How to pluralize nouns
- What about date and time?
- Lokalise saves the day
- Generate resource bundle
- “On the disk” to “Over the air”
- Conclusion
- Further reading
The source code is available on GitHub.
Contents
How to localize your Android App
First and foremost, let’s create an Android project with an empty Activity to be used for our localization purposes. We can use a template provided by Android Studio. For demonstration purposes, let’s make a project with the following configuration:
Add some elements
Now it’s time to put some content into this empty MainActivity. Open up the activity_main.xml file located the in the res/layout directory of our android-i18n project. Let’s put a simple TextView with the string "Hello world" in it:
Next, let’s run this app and see. It should look like this:
But there’s an issue here; the "Hello world!" string value is embedded directly within the layout description of the test_text_view itself. As you may already know, it is elementary level bad practice to hardcode string values within the code of an application. On top of that, you would need this text to dynamically change in case your Android localization application’s user decides to change the app’s language.
Add language resources
How about stocking up our Android app with some language resources holding localization-related values? These will act as static assets holding language content for multiple languages.
The Android SDK provides a specific structure to hold Android app resources. Following this pattern, look inside the res/values directory and you’ll be able to find a strings.xml resource file holding the text strings used in our android-i18n application.
Let’s add a new string resource in strings.xml to hold the "Hello world!" string:
Note that we’ve provided a my_string_name key to refer to our sample text string value "Hello World!". It is acceptable to do so in simple contexts such as this, but please make it a habit to come up with self-explanatory names for your keys. For instance, try settings_language_title or settings_language_description.
Add more resources
We can call upon Android Studio l10n support to conveniently add another resource file.
Let’s create a new resource file for the Russian language using Android Studio’s resource file wizard.
Firstly, right-click on the res folder and choose “New -> Android resource file”:
The wizard will let you choose from a list of available resource qualifiers for your new folder.
Qualifiers are used by the system to decide which resources to load based on the user’s device configuration, such as selected language, screen size, country code, etc. Keep in mind that these qualifiers can be used for other types of resources such as images or layouts as well. You can refer to this Android documentation to learn more about Android app resources.
Secondly, select Locale from the list of available qualifiers and add it to the chosen qualifiers. Now to add a Russian language resource file, choose ru: Russian from the language list. We can keep the Specific Region Only: setting at its default value of Any Region since we will not be narrowing down our localization to particular regions for this example.
Thirdly, set the File name as "strings.xml". You will notice that Android Studio has automatically set a Directory Name of values_ru.
Then lastly, click the OK button and a "strings.xml" file inside a res/values-ru/ directory should be opened.
Now, let’s add Russian language resources to this XML file. Be sure to add the same keys as when creating the "strings.xml" for English US:
Refer the resources
Once we have our resources properly set up for two languages, let’s reference them on our TextView. Open up the TextView in the res/values/activity_main.xml layout. Refer the resource key my_string_name to the android:text attribute of the TextView:
Refer resources dynamically
If you need to dynamically change the strings used in a TextView, you can do it programmatically within MainActivity, as follows:
- Set the title of this activity’s
ActionBarto the string resourceapp_name. - Set the text of
test_text_viewto the string resourcemy_string_name.
Now our android-i18n application is successfully localized for two languages. Let’s run our app again and see what it looks like:
You might be thinking…
It looks the same as before, duh.
But as a matter of fact, we’re no longer showing a hardcoded "Hello world!" value on the TextView. Instead, in its place, we are now representing the test_text_view resource localized according to our Android device’s system language.
We can test this out by running our android-i18n application on an Android device with its system language set to Russian.
Following the same pattern, we can now present our application not just in US English, but also in countless other languages.
However, how do we switch our app to another language without touching the device settings? We’ll explore this in the next section.
Change the application locale programmatically
By default, Android will try to load resources based on the system language set on the user’s device. Therefore, if a Russian user, Ann, with her Android set to the Russian language, opened our android-i18n application on her phone, she’d see an app localized to her own language.
But what if another user wants to use Russian for his android-i18n application on an Android that has its default language set to English?
To deal with this, we will have to programmatically update the locale of our android-i18n application to override the default locale set in the user’s system.
Let’s create a ContextUtils utility class to hold our locale updating methods. Place this within a utils package on the android-i18n application, as follows:
Extend the class with ContextWrapper to allow it to create ContextWrapper objects holding a proxy implementation of Context.
Let’s code an updateLocale method that returns a wrapper Context holding a modified locale of the current activity context, like so:
- Create a new
configurationobject using the resource configuration in the givenContext. - Create a locale list containing the locale to which we plan to switch.
- Assign the default locale for this instance of the JVM to the locale at the first index on this list. Since there’s only one locale present in our example, this will inadvertently set the locale on the
localeToSwitchTovariable as the default locale. - Set the locale list we created in step 2 to the configuration object we created in step 1 using a setter.
- Directly modify the
localefield in the configuration object we created in step 1 with thelocaleToSwitchToparameter on the method. - Set the current
contextvariable to a newContextobject whose resources are adjusted to match the given configuration. - Store the newly updated configuration in the
resourcesfield in the given context. - Return a new
ContextUtilsobject created by passing thecontextvariable as a parameter to theContextUtilsconstructor.
Deprecations across different levels
If you skimmed through the code for the updateLocale method, you might have seen that the implementation faces changes based on the application Android build version. This is due to various deprecations that have occurred through the course of Android API levels.
Let’s reanalyze a few code snippets from the updateLocale method to get a general idea of these deprecations, and how they warranted the code changes that followed:
- The
Configuration.localefield was deprecated in API level 24 (Nougat). This was put in place by Android API developers to make coders move to using getters and setters instead of directly accessing variables. - This was marked as the preferred way of setting up locales (instead of using the direct accessor or setLocale(java.util.Locale)) starting from API level 24.
- Before API level 24, developers could directly access the
configuration.localefield to change it as they wished.
- The
Resources.updateConfigurationmethod was deprecated from API 25 (Nougat++). Context.createConfigurationContexthas been around since API level 17 (Jelly Bean MR1). However, with the deprecation of theResources.updateConfigurationmethod, this was the workaround approach to update the configuration of a context.- Before API level 25, developers could use the
Resources.updateConfigurationmethod to update a context configuration.
With our ContextUtils sorted out, let’s see how to use it on our app to change locale. Let’s open up the MainActivity class on our android-i18n application and put in an overriding method like the below:
This code firstly creates a new ContextWrapper with its locale updated to the Russian language. Secondly, it passes this newly created ContextWrapper to be attached as the context used in MainActivity. Afterward, when this activity loads on startup, it will work on a context that has its locale set to Russian.
That’s it! Simply run the application and voilà, the text has successfully been localized without any manual changes to the Android’s system language on our end.
Some Android localization extras
Let’s take a look at a few other things you’ll surely run into on your Android app localization journey.
How to pluralize nouns
When dealing with nouns, we need them to be properly pluralized according to a particular language’s standards. For instance, we don’t want our Android application to say, “I have 3 cat” instead of “3 cats“, right? This is where Android’s built-in support for quantity strings(plurals) comes in handy. Let’s try it out!
First off, add some TextViews to your activity_main.xml:
These will consecutively hold text for one, few, and many quantities of objects.
As you may know, pluralization rules usually differ from language to language. English only has two main forms, i.e.:
- 1 cat
- 2 cats
While Russian has three variations when counting whole numbers, i.e.:
- 1 кот
- 2 кота
- 5 кошек
Therefore, we will have to create separate plurals elements for each of these languages.
Let’s add these pluralizations in our project’s respective language resource files:
- In
res/values/strings.xml:
- In
res/values-ru/strings.xml:
In case you’re interested, the syntax for plurals elements is documented in the syntax section of the Android documentation for quantity strings.
Now let’s set some plural text values in the TextViews we created earlier. Add these lines to the onCreate method of the MainActivity class:
Refer to the documentation on the Resources.getQuantityString method to get an idea of its parameter usage.
The result should look like this for each localization:
What about date and time?
We can call upon the getDateTimeInstance method provided in the DateFormat class to handle the localization of date and time in Android projects.
Firstly, let’s add a simple TextView within our android-i18n application’s activity_main.xml:
Then, let’s fill this TextView with text showing a localized date and time upon launch of our app.
Open up the MainActivity class and put this code in its onCreate method:
- Create a new Date object with a no-arguments constructor and allocate it to
currentDateTime. Using this constructor makes theDateobject represent the exact time (and date) at which it was allocated. - The
DateFormat.getDateTimeInstancestatic factory method is used to automatically formatcurrentDateTimefor the current locale.
Run the Android app with each localization. It should now show the current date and time successfully localized to the corresponding locales:
Lokalise saves the day
So my friend, if you’ve come this far in the article, you must be dead set on somehow getting your Android app internationalized. But let’s face it, do you — or your team — really have the time to learn all of these new classes and methods and deal with deprecated variables, just to localize your app?
Yeah, I heard you. You don’t.
As you add more features and expand to more markets, your app will grow to thousands of strings in dozens of languages. Surely you could use the help of a proper translation management system to carry out your Android app’s i18n while keeping yourself sane, am I right?
That’s where Lokalise comes in. Let’s see how it works.
First off, create an account or log in to Lokalise—either option will bring you to the Lokalise dashboard:
Secondly, click New project to start creating your localization project:
Thirdly, select Upload files to upload the language resource files of the project you plan to localize:
In the case of the Android application we created during the tutorial, you can choose the strings.xml files we created for the two languages:
Click the Import the files button to complete the resource uploading process.
Head back to the Editor tab of the project’s Lokalise dashboard. You will see the resources neatly organized, like so:
Now, you might be thinking…
Okay, Lokalise has my project’s language resources. How exactly is this useful for me or my organization?
Time to see how!
Generate resource bundle
No need to change countless text files if you need to change some resource values. With Lokalise, you can make resource value changes in a nice UI, and download automatically generated translation files for all your project’s locales for the specified platform.
For instance, suppose you are a dog person and wanted to change the resources to display dog values instead of cat. Simply click on "cat" in the resource values in the Lokalise dashboard and replace it with "dog" in the popup:
Then click the Download tab to download your new translations by performing the following simple steps:
- Choose the
"Android Resources"file format from the list. - Press the
Build and downloadbutton to obtain a ZIP archive with your new translations. - Replace the old files in your project with the new ones.
That was pretty fun and easy, wasn’t it? The Lokalise editor is a feature-rich and user-friendly interface that includes collaborative translation, translation quality assurance, automatic translation suggestions, professional translation services, and loads more to be used for your Android app’s localization.
“On the disk” to “Over the air”
In short, you still had to manually download resources, update, and rebuild or redeploy the whole application in the previous step, right? But, in this information age where everything’s in the cloud, isn’t there an easier way to make resource value changes for an app?
Yes, there is. Say hello to Lokalise OTA (over the air) where Lokalise sends your localizations straight over to your mobile app! How much more convenient can it get? Let’s see how you can set this up.
Firstly, head over to the Download tab on the Lokalise dashboard. Instead of “Android Resources (.xml)”, let’s change it to “Lokalise Android SDK” this time around. Then, we’ll press Build only to instruct Lokalise to generate an Android Bundle holding all your localizations:
This will take you to a bundle version management page where you can manage the generated bundles as you please:
How to update localization values
Each time your app needs any language resource value changes:
- Update the localization values in the Lokalise Editor.
- Generate a new
Lokalise Android SDKbundle. - Set the new bundle as the
Productionbundle and save the changes.
Secondly, let’s introduce Lokalise to your android-i18n application by adding the following to its top-level .gradle file:
Thirdly, let us add the Lokalise Android SDK dependency to your android-i18n app’s module-level .gradle:
Finally, it’s time to initialize the Lokalise Android SDK in your android-i18n app.
A few prerequisites
Head over to your Lokalise project’s dashboard and click on Settings under the More... tab. Here, take note of the Project ID, click Generate new token, and note down the resulting token value as well:
In order to let Lokalise handle its localizations throughout the app, we’d need to initialize the SDK before other processes start. Let’s achieve this by adding a custom Application class inheriting from android.app.Application to your android-i18n app:
Important note: Make sure to always place these lines right after the call to super.onCreate().
- Initialize the Lokalise SDK by calling the
Lokalise.initmethod. Remember to pass the SDK token and project ID noted down in the previous step as the method parameters. - Bring the latest localization values from Lokalise over to the
android-i18nproject.
Let’s not forget to introduce this MyApplication to our android-i18n project’s AndroidManifest.xml file: https://gist.github.com/bodrovis/a283d44aee447d0a338f801943568faa
Now it’s time to ask your android-i18n application to use an Activity context that has the Lokalise SDK injected into it. We’ll make this happen by opening the MainActivity inside your android-i18n project and changing its attachBaseContext method:
You’re good to go! Next time, all updated localizations on the latest bundle will be sent over the air straight to your android-i18n app!
Test it out
Firstly, let’s navigate to the Editor tab of your Lokalise project dashboard. Then, let us change the values for “my_string_name” to say hello not just to the world, but to the whole universe!
Secondly, navigate to the Download tab and generate a new bundle by selecting the “Lokalise Android SDK” format and pressing Build only.
Finally, set the newly created bundle as the Production bundle and click Save changes:
Running our android-i18n application now should reflect the change on both localizations:
Conclusion
In this tutorial, we checked out how to localize an Android application to multiple locales. We explored various API deprecations that caused Android l10n to become less of a walk in the park. We also delved into ways we could effectively tackle these deprecations. Next, saw how we can switch to different languages; either by changing the device’s language or forcefully switching the application to a modified Context. Then, we discovered how Lokalise helps us swiftly retrieve our localizations to our Android app OTA (over the air).
In addition to this, we looked into how we can pluralize nouns using Android quantity strings, and how to perform date-time localization.
And with that, my watch is ended. Please don’t hesitate to leave a comment if you have any questions.
[“source=lokalise”]